SpotBot® Extreme
Data Sheet
![]() Shop this product in our online store
Shop this product in our online store
Products - Microarrayers - SpotBot® Extreme Microarray Spotters
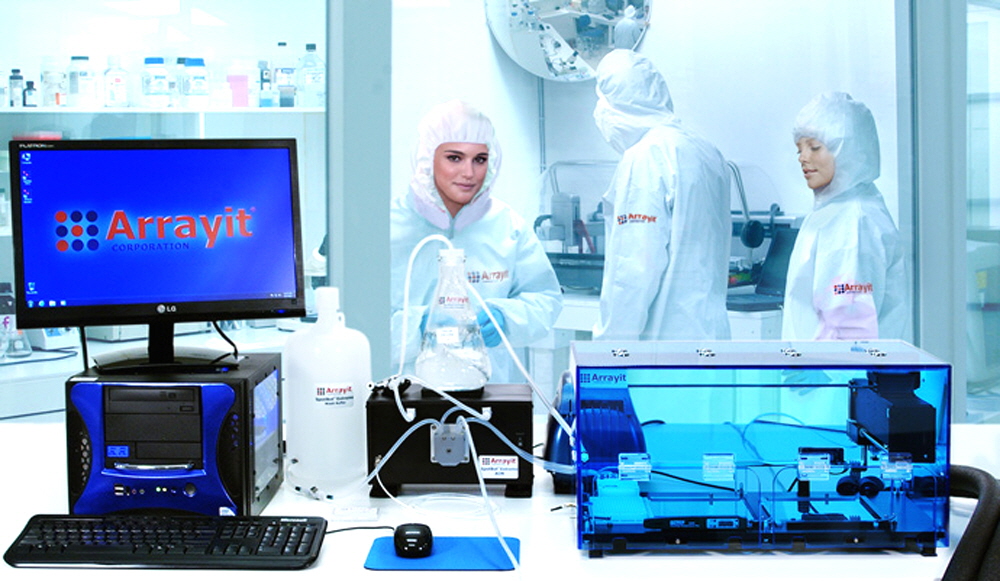
Arrayit SpotBot® Extreme Microarray Spotters build on the legacy of the industry-leading SpotBot® Personal Microarrayers, with 356 installations worldwide and hundreds of scientific publications since being introduced in 2001. SpotBot® Extreme offers excellent speed and throughput while maintaining portability, affordability and compactness. Each system is equipped with 16 microarray printing pins, a professional series printhead, megasonic pin cleaning, humidity control and an Arrayit BioBlue Mini Computer with flat panel display. SBX systems print 10,000 samples onto 28 glass substrate slides in 12 hours. SBX Protein Edition Microarray Spotters offer platen cooling to 4°C to enable the most demanding protein microarray applications in an ambient laboratory environment. SBX and SBX Pro are highly recommended for genomics, proteomics, life sciences, material science and all other applications that leverage microarray technology.
On-Line Resources
Click here to download the SpotBot® Extreme User’s Manual.
SpotBot® Extreme System Specifications and Features
- SpotBot® Extreme are the newest instruments in the SpotBot® product line
- SpotBot® installed in 356 laboratories worldwide since 2001
- Offers speed and throughput at an affordable price
- Highly recommended for all ex situ microarray manufacturing applications
- Manufacture oligonucleotide, cDNA, carbohydrate, antigen, antibody, peptide, and reverse phase microarrays
- Speed gene expression, genotyping, serum profiling and other life science applications
- Study human, mouse, rat, Drosophila, Arabidopsis, C. elegans, yeast, bacteria and viruses
- Supports VIP genotyping and other diagnostics applications
- Heavy duty overhead gantry offers improved precision, speed and durability
- Arrayit patented contact printing technology (U.S. 6,101,946) provides IP protection
- Arrayit printing technology installed in more than 3,800 laboratories worldwide
- Printing technology based on 14 years of commercial success starting in 1997
- Deck capacity of 28 standard glass substrates (25 x 76 mm)
- Deck capacity of 2 standard microplates (96-well or 384-well)
- Two printing zones of 14 substrate slides each
- Printhead holds 16 microarray printing pins in a 4 x 4 pattern at 4.5 mm spacing
- Professional series printhead micro-machined to ±1.3 µm (0.00005”) for unsurpassed precision
- Professional series printhead reduces friction by 90% for printing on membranes and gel surfaces
- Axis resolution and repeatability of ±10 µm provides uniform spot spacing for easy quantification
- Deck accommodates one 384-well microplate for throughput and ease-of-use
- SBX Protein Edition includes liquid cooling of entire deck from ambient to 4°C
- SBX “HotBot” Edition offers 4°C-45°C deck cooling and heating
- SBXPRO enables antigen, antibody, peptide, lysate and reverse phase protein microarrays
- SBXHOT enables protein microarrays, enzymatic and whole cell microarray applications
- All systems include humidity control from 10-80% relative humidity
- Humidity control speed of 5% RH per minute and ±1 % at steady state
- Humidity control minimizes sample evaporation and ensures precise spot diameters
- All systems include megasonic wash station for high efficiency pin cleaning
- Printhead compatible with entire line of Stealth, 946, Green, and Professional microarray pins
- Deck compatible with entire line of Arrayit substrate slides
- Printed microarrays compatible with entire line of Arrayit microarray scanners
- Printed microarrays compatible with entire line of Arrayit labeling and purification kits
- Printed microarrays compatible with entire line of Arrayit hybridization, wash and blocking buffers
- Printing routines allow up to five technical replicates per sample
- Print 10,000 samples onto 28 substrate slides in less than 12 hours
- Print up to 50,000 samples onto each 25 x 76 mm substrate slide
- Systems utilize the latest Windows 7 operating system
- All systems include Arrayit BioBlue Mini Computer
- All systems include LED flat panel display, keyboard, mouse and mouse pad
- Systems are compatible with all standard 120-volt and 220 volt outlets
- Intuitive graphical user interface and design wizard makes programming fast and easy
- Robot size (H x L x W): 27 x 30 x 54 cm (10 x 12 x 21")
- Robot weight excluding accessories: 11.4 Kg (24 lbs)
- Private label and OEM agreements available for volume purchases
- World’s finest and most affordable mid-size microarray spotter microarrayer
- Compatible with class 1 cleanrooms for cleanroom manufacturing applications
- Arrayit cleanroom gloves, wipes, cleansuits, and particle counters highly recommended
- Platen liquid cooling maximizes cooling uniformity, speed and efficiency
- Advanced robotics ensure performance and reliability
- Micro-robotics enable low thermal emission, energy conservation and quiet operation
- Forced air stream pin drying enhances pin cleaning and sample loading
- Low buffer consumption of less than 1 liter per hour
- Minimal air turbulance and humidity control greatly minimizes sample evaporation
- Instrument and accessory vibration dampeners permit printing in virtually any laboratory setting
- SBX systems arrive pre-calibrated and ready to use
- Customer installation time of 1 hour
- All installations include comprehensive technical support by Arrayit staff
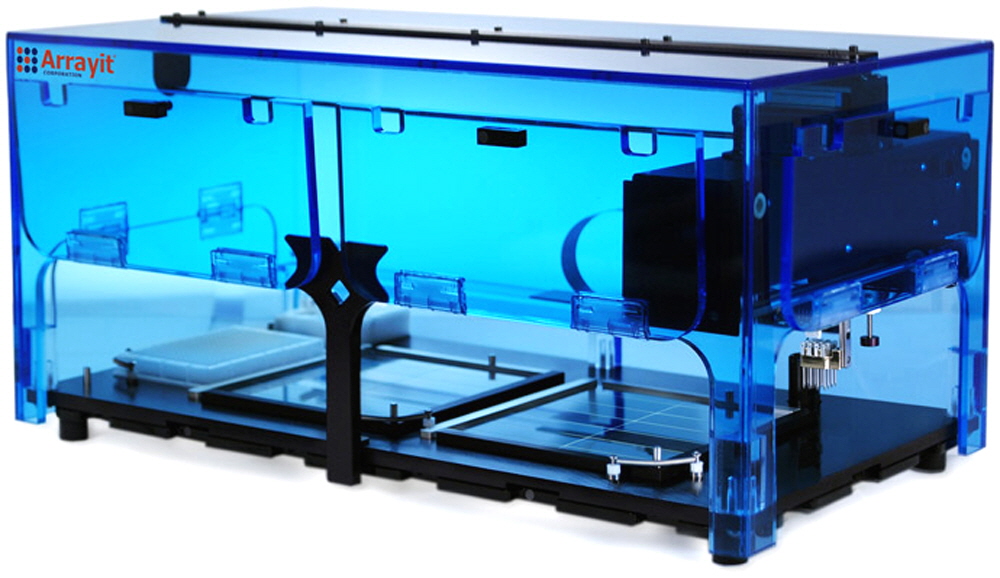
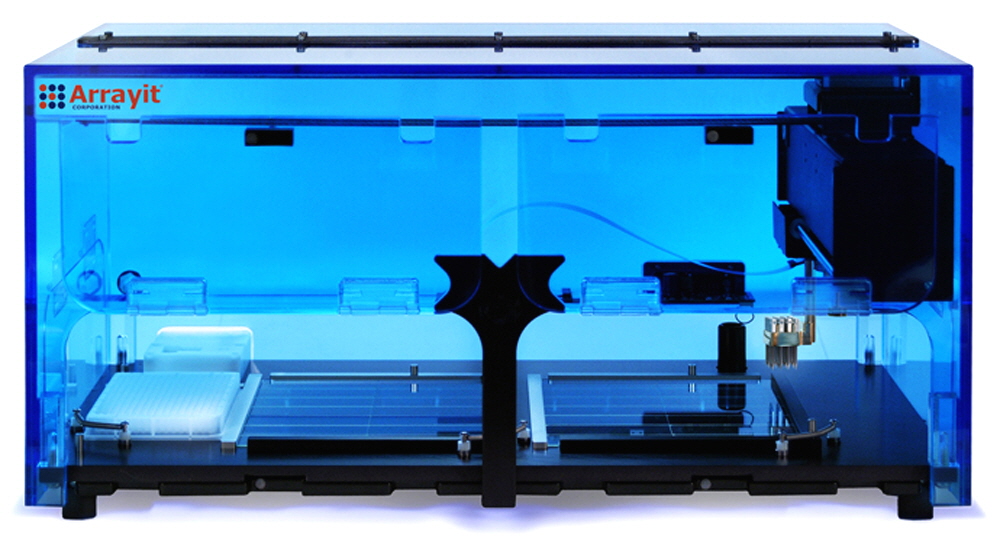
Figure 1. SpotBot® Extreme Microarray Spotting Microarrayer with a single 384-well microplate, 16 microarray printing pins, and 28 glass substrate slide (25 x 76 mm) deck capacity. Four instrument doors with magnetic sensors allow easy loading of microplates, glass substrate slides and microarray printing pins.
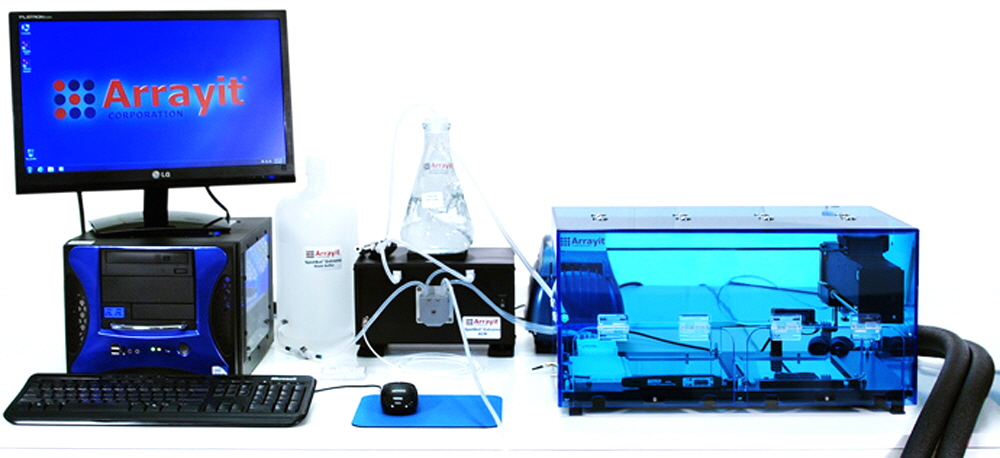
Figure 2. SpotBot® Extreme Protein Edition Microarray Spotting System front view configuration showing from right to left the SBXPRO robot with protein edition cooling tubes and an anti-vibration pad under each instrument foot, Air Compressor, Accessory Control Module (ACM), Humidification Flask, Wash Buffer Reservoir, BioBlue Mini Computer, flat panel display, keyboard, mouse and mouse pad. Tubing connections should be made between fittings of the same color, joining the Wash Buffer Reservoir and the ACM wash buffer line (green to green), the ACM wash buffer line to the SBXPRO wash station wash buffer feed (white to white), the Air Compressor to the SBX wash station pin drying port (red to red), the SBXPRO wash station waste buffer port to the ACM waste buffer line (blue to blue) and the ACM waste buffer line to the Waste Buffer Container on the floor (yellow to yellow). The ACM and Air Compressor are powered on using rocker switches and the humidity control is adjustable using the humidity control valve. Microarray printing pins should be handled using nitrile gloves at all times. The SBX and SBXPRO decks hold one 384-well microplate and 28 glass substrate slides (25 x 76 mm) in a 2 x 2 x 7 configuration. Please make sure the deck is configured properly at all times before beginning a print run.
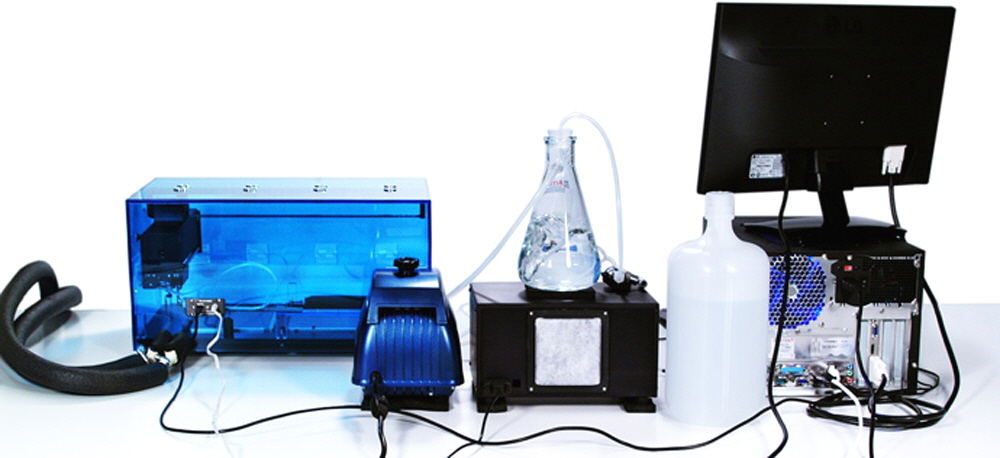
Figure 3. SpotBot® Extreme Protein Edition Microarray Spotting System back view configuration showing from left to right the SBXPRO robot with protein edition cooling tubes and an anti-vibration pad under each instrument foot, USB data cable, instrument power supply, Air Compressor with anti-vibration pad, Accessory Control Module (ACM) with power supply connection and anti-vibration pads under each ACM foot, Humidification Flask, Wash Buffer Reservoir, BioBlue Mini Computer (USB connections to the SBXPRO robot, mouse and keyboard, an Ethernet connection to the Internet, and a DVI connection to the flat panel display), and the flat panel display. The computer power setting (red switch) should be set properly for 110 or 220 volt power sources. Tubing connections should be made between fittings of the same color, joining the Wash Buffer Reservoir and the ACM wash buffer line (green to green), the ACM wash buffer line to the SBX wash station wash buffer feed (white to white), the Air Compressor to the SBX wash station pin drying port (red to red), the SBX wash station waste buffer port to the ACM waste buffer line (blue to blue) and the ACM waste buffer line to the Waste Buffer Container on the floor (yellow to yellow). The ACM and Air Compressor are powered on using rocker switches and the humidity control is adjustable using the humidity control valve. Please make sure that the thumb screws for the ACM power supply and DVI cable are tightened completely to ensure a proper connection. Power cords to the Chiller Bath, Air Compressor and ACM should be connected to a dedicated surge protector and the power cords for the SBXPRO, computer and computer screen should be connected to a second dedicated surge protector.
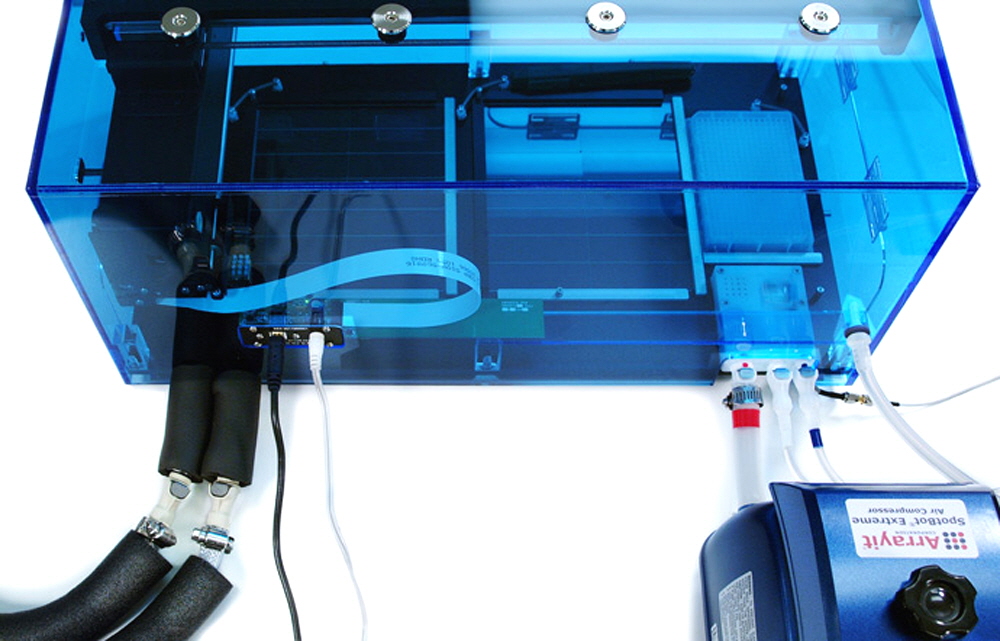
Figure 4. SpotBot® Extreme Protein Edition Microarray Spotting Instrument back view showing from left to right the protein edition cooling tubes, USB data cable, instrument power supply, Air Compressor making the red-red connection with the SBXPRO pin drying port on the wash station, Accessory Control Module (ACM) making the white-white connection with the SBXPRO wash buffer intake port on the wash station, ACM making the blue-blue connection with the SBXPRO wash waste outtake port on the wash station, ACM making the megasonic connection with the SBXPRO wash station, and humidity control connection between the SBXPRO instrument and the humidification flask. Please make sure the USB and power cables are inserted completely into the instrument control panel and that all spring-loaded connections snap into place firmly. Tubes and cables should be as straight as possible and free of tangles and tension at all times during instrument operation.
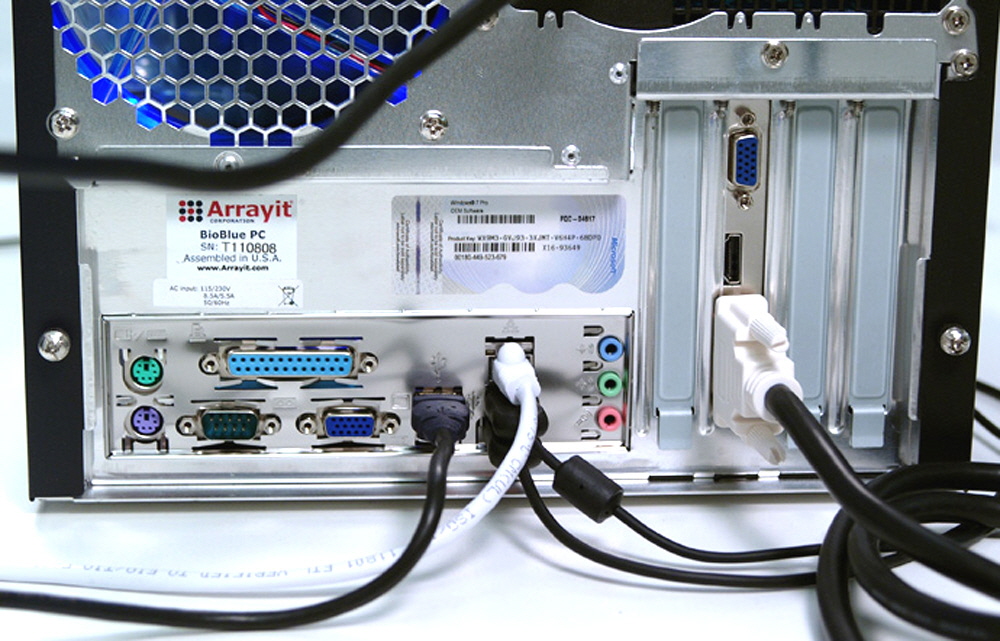
Figure 5. SpotBot® Extreme Microarray Spotting Instrument BioBlue Mini Computer showing the connections on the computer back panel (from left to right) including the USB cable connecting the computer and SBX, Internet cable connecting the computer to the Internet Ethernet jack, USB cable connecting the computer to the keyboard, USB cable connecting the computer to the mouse and DVI cable connecting the computer to the LED flat panel display. The computer also requires a power cord. Please make sure to connect the power cord to an appropriate 110 volt or 220 volt electrical source from a surge protector or power strip.
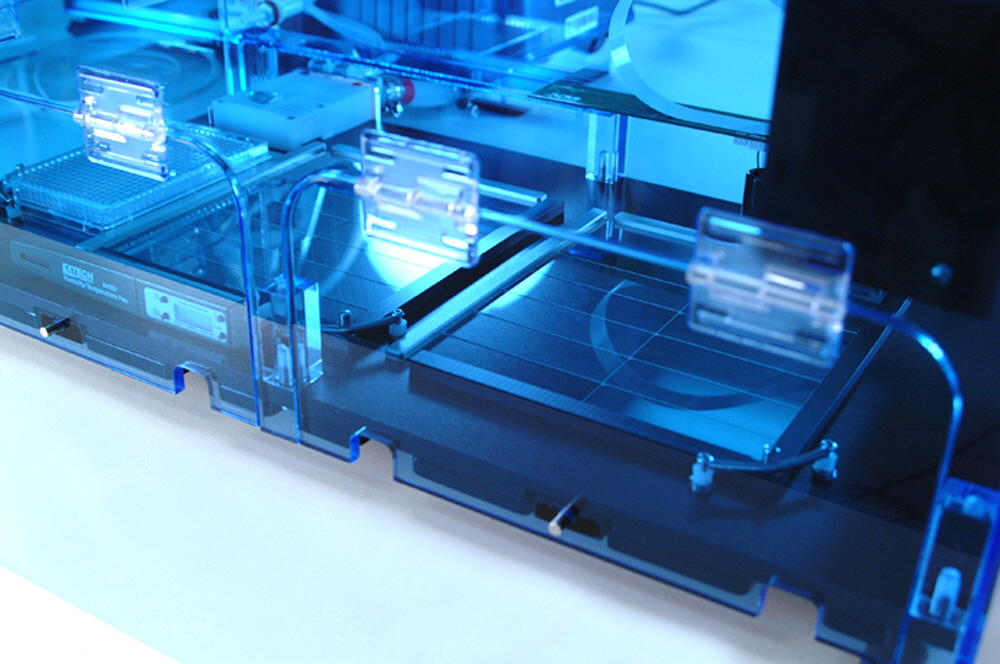
Figure 6. SpotBot® Extreme Microarray Spotter front view showing from left to right the 384-well microplate, megasonic wash and dry station, thermometer/hygrometer, L-bracket 1, printing zone 1 containing 14 glass substrate slides, L-bracket 2, and printing zone 2 containing 14 substrate slides. Four instrument doors (one left, one right and two fore) allow easy access to the 384-well microplates, printed microarrays, and microarray printing pins. Prior to operation, the printing deck should be inspected to ensure proper placement of all deck components.
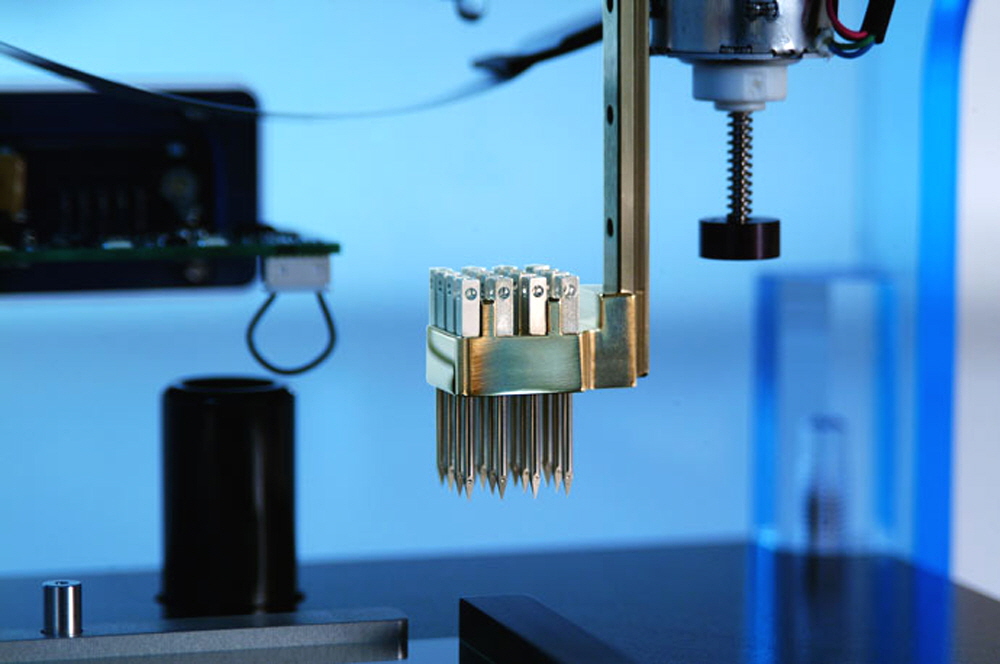
Figure 7. SpotBot® Extreme Microarray Spotting device with 16 microarray printing pins at 4.5 mm centers and a professional series printhead for the finest microarray printing quality available. SBX printheads are compatible with Arrayit’s complete extensive line of microarray printing pins with different tip sizes and sample channel loading volumes, enabling spot diameters from 50-750 microns and up to 1,000 spots per loading for speed, accuracy and versatility in microarray manufacturing. Wear nitrile gloves at all times when handling microarray printing pins. Pull pin caps straight off the prevent pin tip damage. Insert into the printhead as shown.
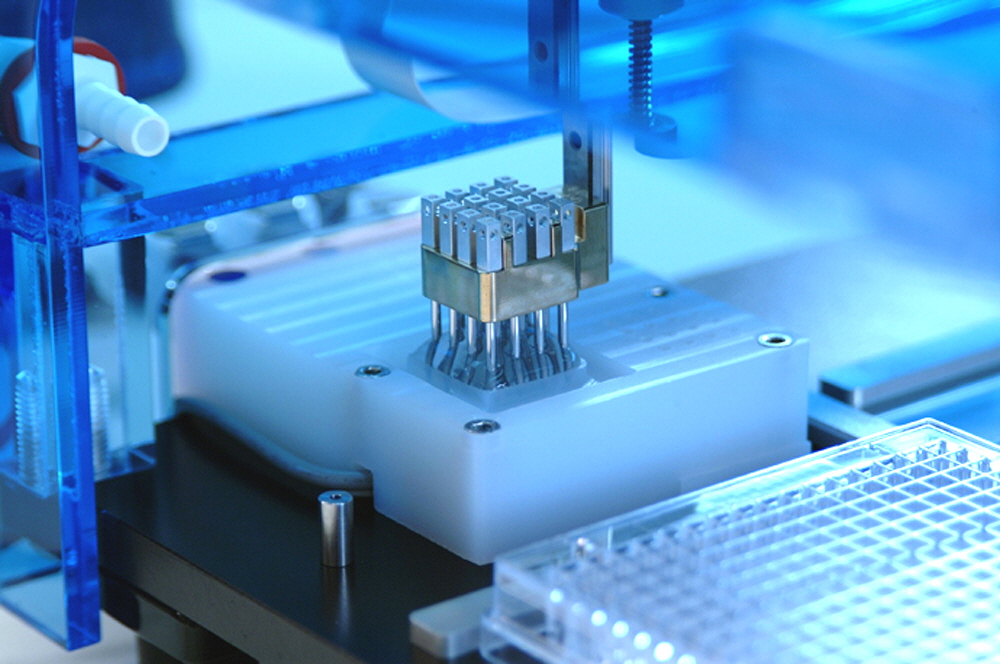
Figure 8. SpotBot® Extreme Protein Edition Microarray Spotter with Megasonic Wash Station option (Cat. MGX), which enables efficient pin cleaning by propogating megasonic sound waves through the wash buffer during the wash step. Sound waves accelerate sample removal from the pin tip channels, a feature strongly recommended for protein microarrays and other applications requiring enhanced pin cleaning.
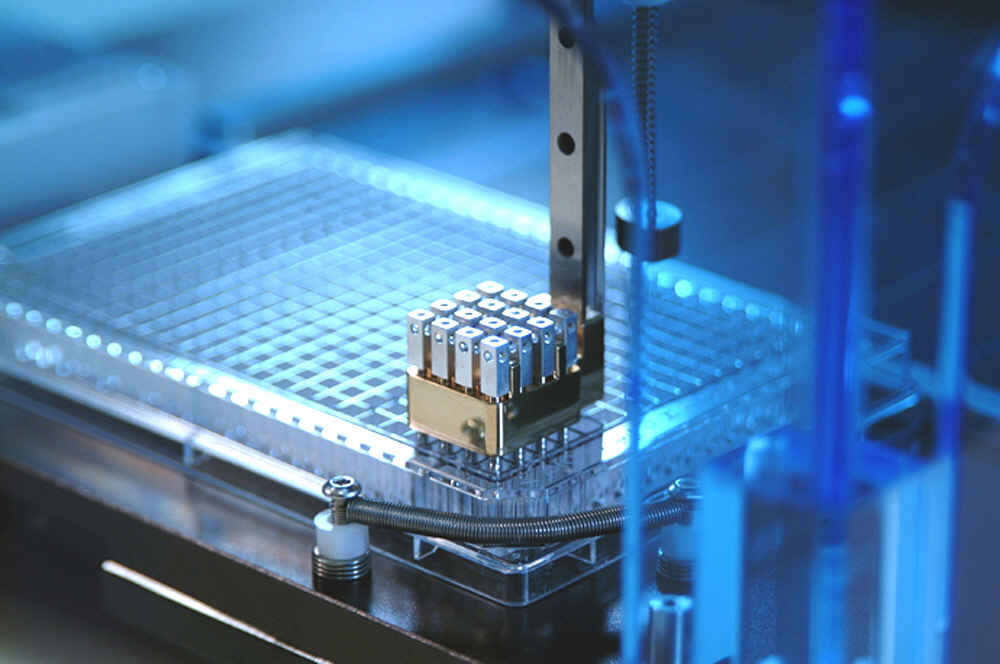
Figure 9. SpotBot® Extreme Protein Edition Microarray Spotter shown at the sample loading location, with 16 microarray printing pins loading samples from 16 wells of a 384-well microplate. SBX Spotters are pre-calibrated such that the pins locate into the well centers during sample loading. Microplate wells contain 5 µl (round wells) or 10 µl (square wells) of sample and pins load 0.2 µl (standard), 0.6 µl (bubble) or 1.25 µl (expanded bubble) of sample depending on the uptake channel design. SBX Spotters minimize sample volumes for highly cost-effective microarray printing.
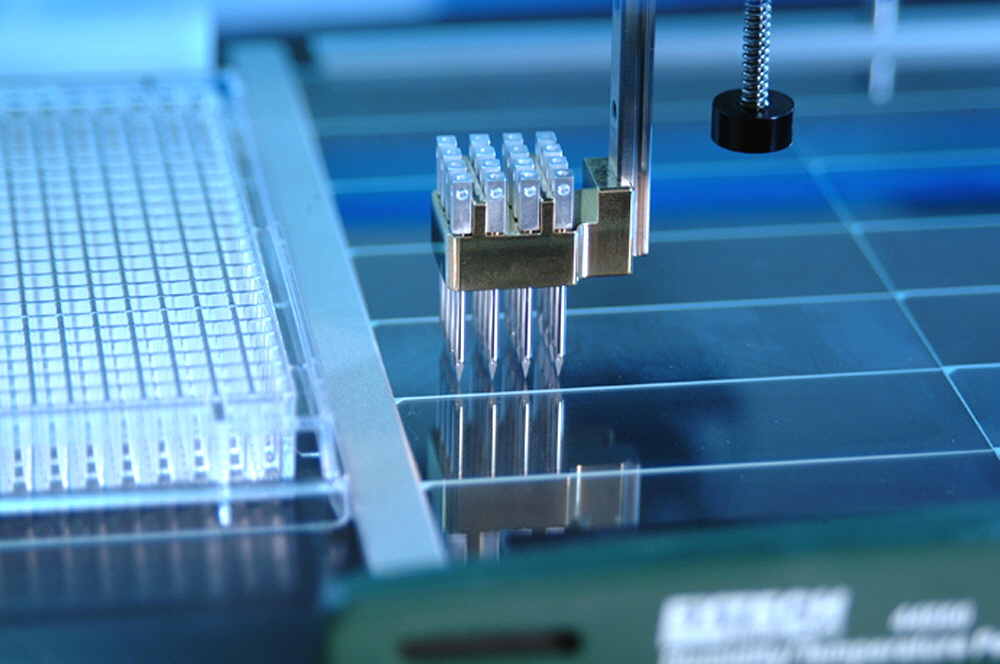
Figure 10. SpotBot® Extreme Microarray Spotter shown at the substrate slide printing location, with 16 microarray spotting pins making contact with the fourth glass substrate slide in the first column of printing zone 1 on the instrument deck. Pins ride freely in the nearly frictionless Professional Series Printhead to enable a gentle and highly reproducible contact printing mechanism.

Figure 11. SpotBot® Extreme Microarray Spotter with ultraviolet light (UV) option featuring super high-flux 365 nm light emitting diode (LED) UV bulbs for high-density, uniform surface illumination of the SBX printing deck.
Quick Installation Guide
1. Configure your SpotBot® Extreme (SBX) on a laboratory bench as shown in Figures 2 and 3.
2. Configure the color-coded SBX instrument connections as shown in Figure 4.
3. Configure the SBX computer connections as shown in Figure 5.
4. Configure the SBX instrument deck as shown in Figure 6.
5. Power up the computer, ACM, Air Compressor and Chiller Bath (SBXPRO).
6. Launch the SpotApp Software and register the instrument.
7. Launch the SpotApp test printing routine on the desktop and run the SBX for 5 min.
8. Wearing nitrile gloves, load 16 pins into the prinhtead as shown in Figure 7.
9. Run the SBX again and make sure the pins locate to the wash station as shown in Figure 8.
10. Make sure the pins locate to the 384-well microplate as shown in Figure 9.
11. Make sure the pins locate to the glass substrate slides as shown in Figure 10.
12. Power off the ACM, Air Compressor and Chiller Bath (SBXPRO) after each use.
