Protein Labeling Kits
Data Sheet
![]() Shop this product in our online store
Shop this product in our online store
Arrayit | Protein labeling kits reactive amines fluorescence cell extracts microarrays life science research
Reagents - Microarray Labeling - Protein Labeling Kits for Direct Protein Labeling with Cyanine 3 and Cyanine 5 Dyes for Protein Microarray Applications

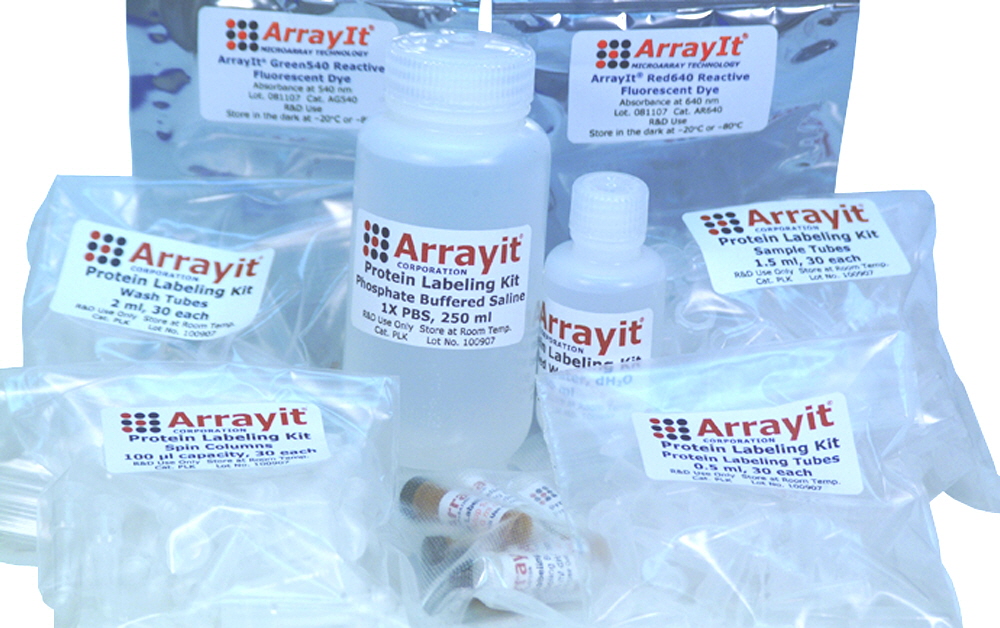
Arrayit Protein Labeling Kits include everything needed for high quality direct labeling of proteins for protein microarray experimentation. Kits include fluorescent dyes, buffers, reagents and purification columns. Arrayit kits leverage the simplicity of direct protein labeling to produce fluorescently labeled proteins for use in microarray binding reactions and other downstream applications. Our kits produce greater yield and more efficiently labeled proteins than other popular labeling approaches by featuring Arrayit Green540 and Arrayit Red640 dyes. Arrayit Green540 and Arrayit Red640 are new dyes that provide superior labeling efficiently and photo-bleaching resistant qualities compared to traditional dyes used in the microarray industry. Arrayit Green540 and Red640 match the Cy3 and Cy5 absorption and emission spectra, which allows users to utilize our labeling kits with their current microarray scanners and imagers.
Table of Contents
- Introduction
- Quality Control
- Product Description
- Kit Contents
- Short Protocol
- Complete Protocol
- Technical Assistance
- Equipment and Reagents
- Troubleshooting Tips
- Ordering Information
- Storage Conditions
- Warranty
Introduction
Congratulations on taking a big step towards improving the economies of scale, quality and speed of your genomics research. This booklet contains a complete set of protocols including the steps and principles needed to use the 2-Color Fluorescent Labeling Kit for proteins.
Quality Control
Arrayit assures the performance of these products. The finest scientific research went into the development of these products. Rigorous quality control monitoring on a lot-by-lot basis guarantees that the columns, dyes, buffers, and protocols conform to the highest industry standards.
Product Description
This product is designed to use in conjunction with protein microarray manufactured by Arrayit. However, it is compatible with other downstream applications.
Users will appreciate the following features:
- Supports all substrate and slide surface chemistries
- Easy protocol, high yields and efficient incorporation
- Bright photo stable dyes
- Can be used with both two- and three-dimensional surfaces
- Superior separation chemistry provides 99+% probe purity
- Dye, hapten and salt removal reduces background
- Kits arrive ready to use, no buffer or column preparation required
- Microcentrifuge format allows rapid purification with single columns
- 90% recovery
- Consistent results
- Easy to use
Kit Contents
Store at Room Temperature
- Protein Labeling Buffer, 3 tubes, dry buffer contents
- Protein Stop Solution, 3 tubes, dry buffer contents
- Protein Labeling Tubes, 0.5 ml, 30 each
- Spin Columns, 100 µl capacity, 30 each
- Spin Column Wash Tubes, 2.0 ml, 30 each
- Spin Column Collection Tubes, 1.5 ml, 30 each
- Distilled Water (dH2O), 50 ml
- Phosphate Buffer Saline (PBS), 1X, 250 ml
Store at -80°C
- Arrayit Green540 Protein Labeling Dye, 50X, 15 µl
- Arrayit Red640 Protein Labeling Dye, 50X, 15 µl
Short Protocol (Steps 1-10)
1. Transfer 100 µl of protein (100 µg) to a 0.5 ml Protein Labeling Tube.
2. Add 20 µl Protein Labeling Buffer to the protein sample.
3. Add 1.0 µl of Arrayit Green540 or Red640 reactive dye to the protein sample.
4. Incubate on ice for 60 min to allow protein-dye coupling.
5. Prepare Spin Columns for dye removal.
6. Add 10 µl of Stop Solution to the protein labeling reaction.
7. Incubate on ice for 30 min to inactivate the free dye molecules.
8. Transfer 65 µl of labeled protein mixture onto each Spin Column matrix.
9. Centrifuge the Spin Columns at 750 x g for 2 minutes to elute the labeled protein.
10. Store the labeled protein at 4°C, -20°C or -80°C.
Complete Protocol (Steps 1-10)
1. Transfer 100 µl of protein (100 µg) to a 0.5 ml Protein Labeling Tube. Set up an ice bucket and place one 0.5 ml Protein Labeling Tube on ice for each protein sample to be labeled. Aliquot 100 µl of protein sample representing 100 µg into the 0.5 ml tube. If the concentration of protein is greater than 1.0 µg/µl, pipette a volume equivalent to 100 µg and add 1X PBS to make a 100 µl final volume. Mix each sample by gently flicking each tube. As much as 1.0 mg of protein can be labeled and purified using this protocol. Users are encouraged to perform a protein titration series to determine the protein quantity that performs optimally in a given assay.
2. Add 20 µl Protein Labeling Buffer to the protein sample. Protein Labeling Buffer (clear 1.5 ml tubes) is provided dry. Prior to use, add 1.0 ml of dH2O to the dry Protein Labeling Buffer contents and mix to dissolve by vortexing for 1 minute. Make sure the dry buffer contents have been suspended completely before use. Add 20 µl of Protein Labeling Buffer to each 100 µl (100 µg) protein sample and mix by gently flicking the tube or by vortexing. Protein Labeling Buffer is slightly basic in pH, which facilitates coupling reactions between primary amines on the protein surface and Arrayit Green540 and Arrayit Red640 dye molecules. The final reaction pH should be 8.5-9.0. Protein Labeling Buffer is stable in the aqueous phase for 24 hours on ice, after which time the buffer should be discarded.
3. Add 1.0 µl of Arrayit Green540 or Red640 reactive dye to the mixed protein sample. Obtain Arrayit Green540 and Arrayit Red640 from -80°C and thaw on ice. Mix gently before use. Transfer 1.0 µl of dye to each protein labeling reaction and mix well. The protein samples will appear brightly colored after dye addition. Shield the protein samples from the light using an ice bucket lid, aluminum foil or an equivalent opaque material to prevent dye photo-bleaching during the coupling process.
4. Incubate on ice for 60 min to allow protein-dye coupling. During the 60 minute incubation, dye molecules will couple covalently to primary amines on the protein surface, resulting in directly labeled fluorescent protein molecules. The molar ratio of dye to protein is approximately 40:1, which should result in 5-10 dye molecules per protein when 100 µg of protien is used for labeling. The volume of dye can be increased or decreased to produce a greater or lesser number of dyes per protein, though 1.0 µl of dye per 100 µg protein should produce high quality results for most proteins. Up to 1.0 mg of protein can be used in labeling reactions containing 1.0 µl of Arrayit Green540 and Red640.
5. Prepare Spins Columns for dye removal. During the 60 minute dye coupling step, prepare two Spin Columns for each protein labeling reaction. Gently tap each Spin Column to ensure that the gel matrix locates to the bottom of the column. Remove the column cap and add 650 µl 1X PBS to each column. Mix vigorously by vortexing to disperse the gel matrix completely in the PBS buffer. Tap the column sharply to remove air bubbles and incubate for 30-60 min at room temperature to hydrate and activate the gel matrix for purification. After the 30-60 min hydration step, remove the column cap and column end stopper from each column. Place each Spin Column in a Spin Column Wash Tube and centrifuge for 2 min at 750 x g to remove the PBS buffer. Remove the Spin Column from the Wash Tube and blot the column end gently on a laboratory wipe to remove residual PBS buffer. Discard the Wash Tube and place the activated Spin Column in a Spin Column Collection Tube. The Spin Columns are ready for use at this stage.
6. Add 10 µl of Stop Solution to the protein labeling reaction. Protein Stop Solution (brown 2 ml tubes) is provided dry. Prior to use, add 1.0 ml of dH2O to the dry Stop Solution contents and mix to dissolve by vortexing for 10 sec. Make sure the dry buffer contents have been suspended completely before use. Add 10 µl of Stop Solution to each protein-dye labeling reaction and mix by gently flicking the tube or by vortexing. Protein Stop Solution is slightly acidic in pH (pH 4.5), and addition of Stop Solution neutralizes the slightly basic protein labeling reaction as it inactivates non-reacted dye molecules. The addition of 10 µl of Stop Solution should produce a final sample pH of 7.5-8.0. Protein Stop Solution is stable in the aqueous phase for 24 hours on ice, after which time the buffer should be discarded.
7. Incubate on ice for 30 min to inactivate the free dye molecules. After adding 10 µl of Stop Solution, incubate the protein mixture on ice to inactivate the non-reacted dye molecules. Shield the protein samples from the light using an ice bucket lid, aluminum foil or an equivalent opaque material to prevent dye photo-bleaching during this step.
8. Transfer 65 µl of labeled protein mixture onto the Spin Column matrix. The neutralized protein sample should have a final volume of 131 µl. Pipette half of the contents on each of two spin columns, 65 µl per column. Make certain to pipette the 65 µl protein sample directly onto the gel matrix, and avoid touching the sides of the column with the pipette tip. This loading procedure will ensure efficient dye removal during the centrifugation step.
9. Centrifuge the Spin Columns at 750 x g for 2 minutes to elute the labeled protein. Place the Spin Column-Collection Tube assemblies in a centrifuge and spin the assemblies for 2 minutes at 750 x g to purify the dye-labeled protein sample. The two Spin Columns per sample should be placed in opposite positions in the centrifuge to allow for proper balancing during centrifugation. The labeled protein molecules will elute into the Collection Tube and the free dye molecules will remain trapped in the gel matrix. Following centrifugation, remove and discard the Spin Column and place the Collection Tube containing the labeled protein sample on ice. The yield of labeled protein should be ≥90% (~90 µg) of labeled protein from 100 µg of protein starting material. Two columns have a total capacity of 1.0 mg of labeled proteins for users who choose to label larger protein quantities.
10. Store the labeled protein at 4°C, -20°C or -80°C. Labeled protein samples can be used immediately for protein microarray experimentation and other downstream reactions, and such samples should be stored on ice or at 4°C for several hours until use. Samples to be used up to 30 days later should be stored at -20°C. Samples to be used greater than 30 days later should be stored at -80°C, and samples stored at -80°C are stable indefinitely. All samples should be stored in the dark to prevent photo-bleaching during storage.

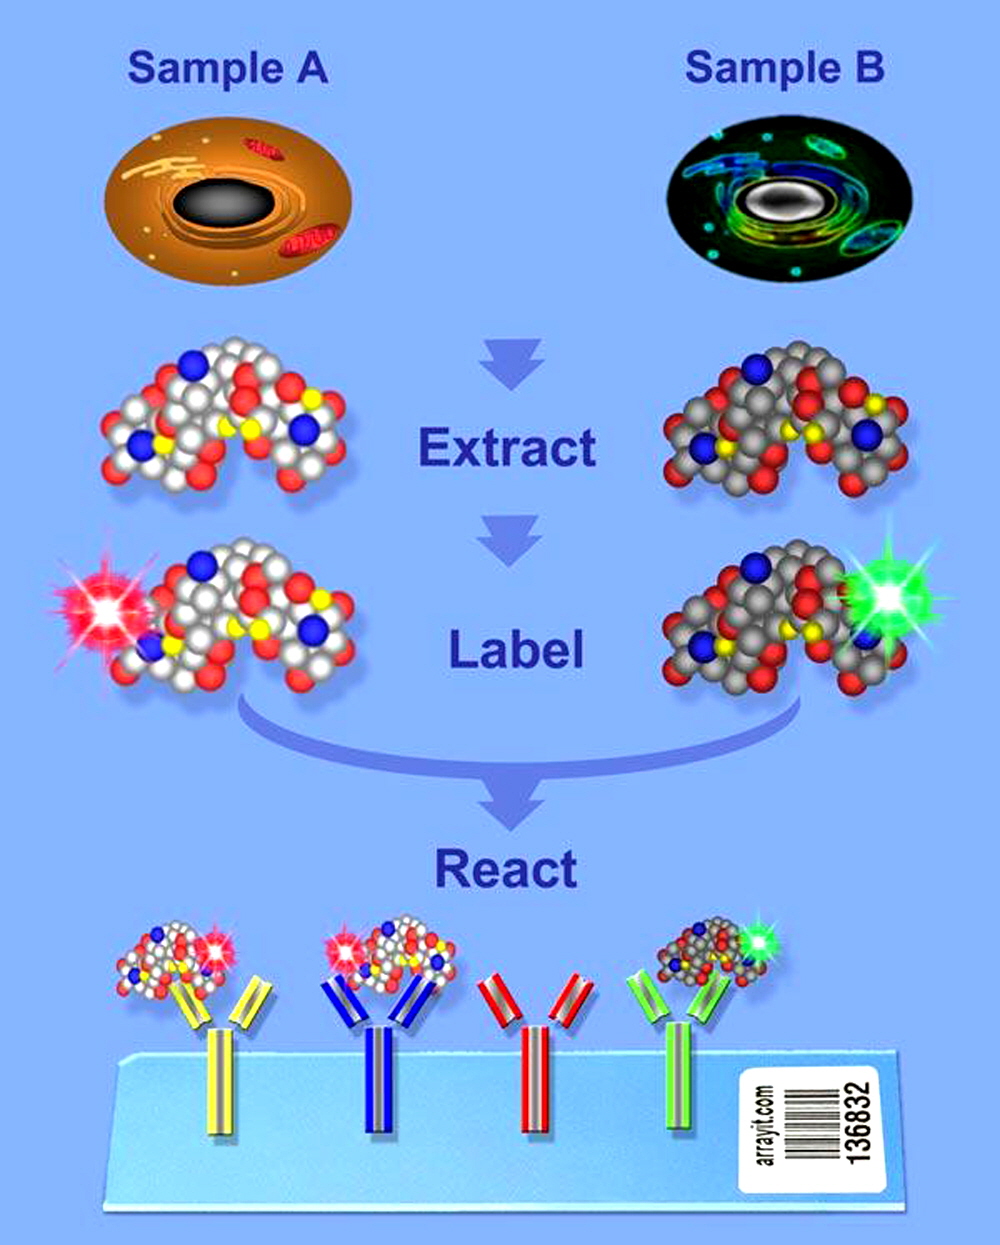
Figure 1. Two color antibody microarray. Compare two biological samples to measure the absolute and relative differences in protein expression. This procedure is fluorescence-based and compatible with all current microarray scanners. Extracted proteins are directly labeled (kit provided) and analyzed. The covalently immobilized antibodies capture fluorescently labeled antigens during the reaction step. Normal and cancerous cells can be compared. The raw data provide a measure of proteins from samples A & B (see above graphic).
Technical Assistance
Please contact us if you have any comments, suggestions, or if you need technical assistance. By electronic mail: arrayit@arrayit.com (under the subject heading please type Arrayit technical assistance). By email: arrayit@arrayit.com, Monday—Friday PST 9:00am - 4:30pm. Please remember that we want to hear about your successes!
Equipment and Reagents
Antibody Micorarrays
Microarray Instruments
Troubleshooting Tips
Dyes, haptens, chromophores and salts can be removed from proteins other than IgG using Pro·Spin spin columns. However, recovery of the protein may be reduced due to specific or non-specific interactions with the column matrix. Below is a list of common modes of interaction together with suggestions for their minimization.
Problem & Possible Solution
Hydrophobic interaction with column matrix
- Add non-ionic detergent, decrease ionic strength or increase pH of hydration buffer
Ionic interaction with column matrix
- Increase ionic strength of hydration buffer
Sample precipitation
- Increase ionic strength, remove salt from hydration buffer or dilute sample.
Protease degradation of sample
- Add suitable protease inhibitor to hydration buffer.

